- Aug 25, 2006
- 4,436
"Thank You" FreeFlyer
Let me begin by sharing that likely several ordered the custom vacuum boost gauge from FreeFlyer a couple months ago and then sadly he ran into supplier difficulties as such the process took much longer than anyone anticipated. Now having shared this when he presented this project to the Forum I immediately purchased two and now a couple months later are there any regrets; NO
Both gauges arrived with a cool CD with pictures and instructions (even though I think they could be a bit more detailed) nevertheless the package also included vacuum hose, a prefabricated harness encased in OEM style wire loom material, the 3 bar MAP, and misc zip ties. Initially the plan was for me to install the first of the two and then create a second set of instructions for Mike at Polito Ford as he was to be installing one into one of the Forum member's gals; in fact the fellow that just had the article in Modified Luxury and Exotics.
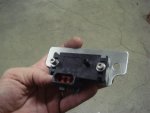
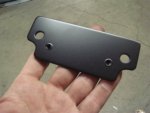
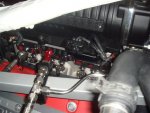
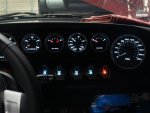
In any case timing was such that I was unable to install the first so I shipped it over night to Canada and then Mike proceeded to be the guinea pig on this project. We chatted numerous times as the project progressed and then finally last night we discussed the mounting of the proprietary MAP sensor for the new gauge. Now FreeFlyer has made the process painless through the use of a couple zip ties that will secure the MAP sensor to the upper radiator hose however being as I am I wanted it to have a bit more of an OEM look and feel to it which resulted in the mounting plate as can be seen in the following pictures. Once I completed the bracket I scanned a drawing of it to Mike at Polito Ford and he promptly had his machine shop create the piece and then "wholla" system one was completed. As Mike stated; it appears as OEM except that we now have a gauge that will sweep from 30 inches of vacuum to 30 PSI of boost wheras the OEM is limted to 15 PSI of boost and does not register vacuum or boost properly once a Mafia or other such MAF scaler is used. Once the gal was fired up everything worked flawlessly and then when the gal was exercised the boost as seen on the new gauge matched exactly what had been registered on the dyno as such we consider this project not only a wrap but also a great success.
At this point all that remained was the integration of the new gauge system into my gal as such with Mike's hands on experience I commenced.
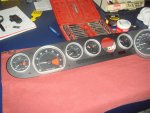
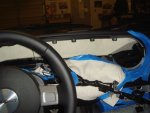
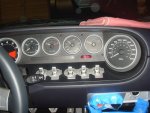
Let me share (as Mike and I have discussed) that this is at least a several hour process because the instrument cluster must be completely removed and slightly modified; specifically two additional holes need to be drilled in a rather basic instrument brace because the securing studs for the new gauge are a bit closer together; truly NBD and the center console and the bulkhead cover need to be removed so that the custom wiring harness can be run from the instrument cluster all the way back into the engine compartment to the new MAP sensor.
At thie present time I have removed the instrument cluster from my gal and installed the wiring harness. I have fabricated the MAP bracket and mounted it and run both the vacuum line and the power source to it. All that remains is the installing of the new gauge into the OEM cluster and then the methodical process of putting everything back together.
I would rate the scale of difficulty for this project as moderate. It is not for the faint of heart and in candor we both found that removing the instrument cluster is challenging. Plenty of painters tape was throughout the process and then I suggest that you add a large dose of patience into the mix of tools used during this project.
Takes care
Shadowman
Attachments
Last edited:


