Do it yourself Halon extinguisher install


2112

Blue/white 06'
Mark II Lifetime
After seeing the sad scene of another's GT go up in flames, I jumped on the Halon extinguisher. I do not want to see my car disappear especially with all the upgrades just finished at Discovery Automotive. I am trying now to bump my agreed value policy upward but upgrades are hard to justify even with agreed value.

Anyway, I went with the Discovery Automotive version because I am biased having had such a good experience and because this version comes with the 2 mounting clamps and custom mounting bracket which may be overkill, but I like it that way.

I overnighted the factory Transaxle cooler plate/bracket to Bill and he got it right back to me ready to be installed. The blue tape is on the factory piece.
 

Attachments

  • 100_0917.jpg
    100_0917.jpg
    106.6 KB · Views: 459
  • 100_0916.jpg
    100_0916.jpg
    114.9 KB · Views: 460

2112

Blue/white 06'
Mark II Lifetime
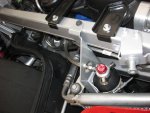
Mounting the hard line was as simple as removing the front bolts of the square support struts and replacing them with the supplied longer bolt running thru the supplied mount,

I swapped out the mounting bolts on the nozzle units with stainless as I live on Saltwater and the black oxide rusts too fast.

A little gentle manipulation of the hard line is necessary to make the Nozzle brackets square up to the frame perfectly.

Top of bolts are 10 mm heads, nuts underneath are 13 MM. This is a common combo on this project.
 

Attachments

  • 100_0924.jpg
    100_0924.jpg
    172.7 KB · Views: 461
  • 100_0918.jpg
    100_0918.jpg
    148.6 KB · Views: 459

BlackICE

GT Owner
Nov 2, 2005
1,416
SF Bay Area in California
Looks nice. To my knowledge only Bill cuts an hole through the bracket to match the hole in FRPP cooler bracket. A nice aesthetic touch that is not really needed, but completes the OEM look of the system. BTW you save a few grams of weight. :lol
 
Last edited:

2112

Blue/white 06'
Mark II Lifetime
After getting the hard line loosely secured, I dropped the FRPP cooler loose in back and had a towel waiting below should I drop anything.

I forgot to mention, Bill advised a drop of light oil on the threads of the stainless steel swedged fitting before spinning them together.

The black bolts on the frame are 11mm and the bolts holding the cooler to the frame are again 11mm on top and 13 below. There are several rubber grommets with steel inserts here so watch for those to fall out.
 

Attachments

  • 100_0921.jpg
    100_0921.jpg
    120.3 KB · Views: 461
  • 100_0923.jpg
    100_0923.jpg
    58 KB · Views: 456
Last edited:

2112

Blue/white 06'
Mark II Lifetime
Now I screwed up and forgot to reread the directions from Bill.

The clamps have bolts too long and you need to cut those short by .500" first. I had to take it all apart to fix this, don't make that mistake.

See how close that bolt is getting to the painted frame? :frown
 

Attachments

  • 100_0926.jpg
    100_0926.jpg
    127.3 KB · Views: 456

2112

Blue/white 06'
Mark II Lifetime
Here you can see after it is cut and mounted with Carburetor vacuum caps placed over the bolt ends.

Also a picture of the gauge reading through the factory bracket as Clinton mentioned above;

This picture also shows the red activation cap secured in place with the supplied wire as directed by Safecraft.
 

Attachments

  • 100_0928.jpg
    100_0928.jpg
    133.6 KB · Views: 451
  • 100_0927.jpg
    100_0927.jpg
    149.1 KB · Views: 455

Fubar

Totally ****** Up
Mark II Lifetime
Le Mans 2010 Supporter
Aug 2, 2006
3,979
Dallas, TX
ive had one of these on my car sense 2006. 16 fuel injectors sitting on top of the motor fully exposed to, well all sorts of stuff. I had some leaky injectors early on... nightmares of burning to death every sense. I wish someone would fabricate a nice pull switch halon system that would blow around the front and rear of the tank. It only takes 5% halon to air ratio to extinguish a fire. I've got about 3gal of halon so far, need about 3 more to be cozy.

Fire is the natural enemy of a fury man. It is my kryptonite, that and spiders. **** spiders... that is all.
 

2112

Blue/white 06'
Mark II Lifetime
Now. Everything is secured. Total install time is less than 2 hours. Both Safecraft and Bill insist on testing for leaks. For this you need a sniffer. I thought no problem, I love buying tools.................it took 5 stores to find an electronic sniffer. Most want you to slather dye over everything and look at it with a black light. Not happening here as I am sure you can appreciate.

The sniffer is first calibrated for background halon or other refrigerants and then you sniff all the fittings.
 

Attachments

  • 100_0930.jpg
    100_0930.jpg
    148.6 KB · Views: 463
  • 100_0931.jpg
    100_0931.jpg
    138 KB · Views: 442
  • 100_0929.jpg
    100_0929.jpg
    141.1 KB · Views: 440

2112

Blue/white 06'
Mark II Lifetime
Yeah Mark, This is mostly for us newbies. I would have guessed you already had one with all the over the top modifications you have made. :thumbsup I did not know that Halon was that powerful though. I don't know how much is in the bottle but is is pretty large and has some heft.

This system is pressurized and fully automatic.

When you compress the red cap, the lines are filled. I mention this because my sniffer detected a leak here. My guess was that some excess halon filled the underside of the red cap. I tried to blow it out but the sniffer could still detect something. So I was Forced to take it for spin, which turned out to be a 150 mile round trip up to Seattle to my Alma Matter (University of Washington) and to the old Burger joint called Dick's (go ahead and snicker, they are a Seattle landmark chain with the best special sauce ever).

Got home and sure enough......no more reading from the sniffer. All joints tested good. :biggrin

Now on the sniffer. If another Forum member wants to install his own Halon system, I am willing to lend the sniffer. Ground shipping to and back should be about 1/3rd of the 85 bucks the unit cost. Funny thing was the sniffer instructions were hilarious. Something lost in the Chinese translation. :lol Did you know you can test your dry cleaning for excess chemical usage with the "sniffer". :biggrin
 
Last edited:

2112

Blue/white 06'
Mark II Lifetime
PS

It is a very very tight fit to ratchet down the clamping bolts. A full length wrench barely fits. If you have stubby Gearwrenches, it will be much much easier. This is a picture of the stubby gearwrench on the nut (before I shortened it) you can see even this short wrench was a tight fit;
.
 

Attachments

  • 100_0922.jpg
    100_0922.jpg
    146.1 KB · Views: 438

nota4re

GT Owner
Mark IV Lifetime
Le Mans 2010 Supporter
Feb 15, 2006
4,294
2112 - Great, quality work and great write-up. This how-to can be very informative and we can reference it in lieu of an instruction manual!

I'm attaching a picture from someone who installed our system this week and was kind enough to send me a few snapshots. In the pic below, please note that he chose to make a slight orientation change to the bottle. Now, perhaps after seeing your orientation, he may opt to change his... or maybe he likes the way it is. Also note that the two clamps can either be cut as you suggest as set off to a slight angle as shown.

IMG_3725.JPG

Please note that if a customer specifies that they are mounting to the large Ford Racing transaxle cooler bracket, the kit will ship with the larger, dual clamp bracket. If using in conjunction with the Cool Tech transaxle cooler (or no cooler), the system ships with a single clamp bracket. Both solutions are robust and both fit well to the environment they are intergrated to.

Once again, great work!
 

sandman

GT Owner
Mark IV Lifetime
Jul 10, 2006
465
Gardnerville, Nv.
2112 Have the same system on both cars, wouldn't do it any other way. Great sense of security!
 
Last edited:

2112

Blue/white 06'
Mark II Lifetime
This how-to can be very informative and we can reference it in lieu of an instruction manual!

Thank you, but I would not say it replaces a manual.

It is easy though. Everyone should buy one now and get it installed.

And BTW. I mentioned the 10mm/13mm combo....My bad, on my car the bolts to hold the cooler were 13mm/13mm. So all you need are 10,11 and 13 MM wrenches and a 10AN/1" wrench for the red activating cap.
 

soroush

Ford Gt Owner
Mark II Lifetime
Aug 8, 2007
5,256
lol, I recently installed the same thing, but didnt get to "sniff" the joints, can you tell us where you got the sniffer, I was going to ask you to lend it to me, but at 85 buck I like buying tools too :)
 

paul b

GT Owner
Nov 2, 2006
810
lol, I recently installed the same thing, but didnt get to "sniff" the joints, can you tell us where you got the sniffer, I was going to ask you to lend it to me, but at 85 buck I like buying tools too :)

I think an air conditioning leak detector should work
 
H

HHGT

Guest
but didnt get to "sniff" the joints

Famous last words of a past President!
 

nota4re

GT Owner
Mark IV Lifetime
Le Mans 2010 Supporter
Feb 15, 2006
4,294
I honestly don't think a sniff detector is mandatory. As a last step of the install, it is wise to go around to every connection and using the proper wrenches - one to hold and the other to snug - make sure all of the gas joints are tight. A small single drop of oil is always a nice touch. I start on the driver's side and then work my way over to the connections at the T-joint and then finally, the bottle itself. It is prudent to check the gauige occasionally and make sure the pressures stays good thereby affording 24/7/365 fire protection.
 
H

HHGT

Guest
All this talk of fires has got me worried. Kendall schedule me for an install.
 

2112

Blue/white 06'
Mark II Lifetime
lol, I recently installed the same thing, but didnt get to "sniff" the joints, can you tell us where you got the sniffer, I was going to ask you to lend it to me, but at 85 buck I like buying tools too :)

I hit 4 automotive stores, 2 small local shops I prefer to patronize, 2 huge places and ended up at Harbor Freight, My least favorite place. The offer stands, I would guess about 15 bucks one way for ground shipping if you need it. I don't do too much dry cleaning so I won't be using it too much. :biggrin

I think an air conditioning leak detector should work

Yes, I believe they are one and the same.
 

DanielJ

GT Owner
Dec 21, 2010
298
Washington State
Great write up! Now on my to do list for the car. Thanks again for sharing the installation process for us DIY guys and like most, the pictures are very helpful.

DJ.