Several here have asked for a step by step gauge replacement how-to. We’ve done our fair share of gauge replacements and upgrades – maybe a couple of dozen, so here are the steps from our experience. Note that a couple of the harder steps are right up front (disconnecting the harnesses), so if you can get past these, you may be on your way!
1. Disconnect the Battery.
Remove the inner bonnet liner and use an 8mm wrench to loosen the ground terminal on the battery and remove.
2. Disconnect the Instrument Cluster harness connectors.
Working in the driver’s side footwell, look at the highest connectors on the driver’s side kick panel. You will see a larger harness that Y’s into two connectors. Before the Y, the haness is often labeled “Instrument cluster”. You will need to disconnect both connectors – one at each end of the Y. Also, securing the cable in place will be a nylon press-in locator. You will need to un-secure this tie-down point. With the connectors and this nylon locators un-done, push up on the harness a bit and make sure it is not caught on anything.
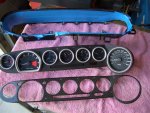
3. In preparation for the gauge panel removal, you will want to use a lot of blue protective tape to insure that known of the plastic is scratched. Refer to the picture below of the blue-taped binnacle. Note that you will not remove the binnacle as we have in the picture, but this should give you an idea of the tape coverage. Also tape over the switches. Finally, adjust the steering wheel to its lowest possible position. Tape the top of the steering wheel and then place a towel over the exposed part of the steering column.

4. With everything taped and a cloth on the steering column, you are ready to remove instrument panel. Using a small Torx screwdriver, carefully remove all of the screws in the face of the panel. With the screws removed, grasp the perimeter of the water temp gauge and try to pull it forward. The left side of the cluster needs to come forward first, followed by the speedometer which comes out last (because it needs to move slightly right to left). Be patient, as tugging the cluster forward is often not easy. Just take your time…. scoot the seat forward and make yourself comfortable. It way be necessary to angle the panel slightly upward of downward in order to wiggle it forward. Also, it sometimes helps to press up on the “roof” of the binnacle with your knuckles as you pull the panel forward. Again, work it gently and you’ll get it!
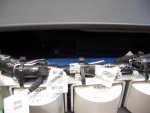
5. As the cluster pulls forward, make sure the harness behind it isn’t hanging you up. Eventually you will be able to pull the cluster toward you and then to lie it facedown on the towel you have on the steering column. See the picture below. Note: In almost all cases you will NOT have enough room to completely remove the cluster from the car as you will not be able to “clear” the connectors at the end of the harness.

6. It is in this position – facedown on the column, that I would recommend that you replace the errant gauge. You will likely need to remove one or more nylon ties. Carefully note the position so you can replace them exactly. (Even though we have done this more than a dozen times, we still take a couple of digital pics – just in case.)
7. With the replacement gauge(s) in place, assembly is simply the reverse of the steps mentioned. The cluster will likely fight you a bit when you are trying to push it back in place. First in is the speedometer (right) side and then work the left side in. You may need to change the angle (up/down) and also press up on the hood of the binnacle. Eventually, you will get it pressed back into place.
8. Re-install the Torx screws and then crawl back under the dash to re-connect the harnesses and press the locator back into its place. Finally, reconnect the battery.
Feel free to PM or email me if you have any questions.
1. Disconnect the Battery.
Remove the inner bonnet liner and use an 8mm wrench to loosen the ground terminal on the battery and remove.
2. Disconnect the Instrument Cluster harness connectors.
Working in the driver’s side footwell, look at the highest connectors on the driver’s side kick panel. You will see a larger harness that Y’s into two connectors. Before the Y, the haness is often labeled “Instrument cluster”. You will need to disconnect both connectors – one at each end of the Y. Also, securing the cable in place will be a nylon press-in locator. You will need to un-secure this tie-down point. With the connectors and this nylon locators un-done, push up on the harness a bit and make sure it is not caught on anything.
3. In preparation for the gauge panel removal, you will want to use a lot of blue protective tape to insure that known of the plastic is scratched. Refer to the picture below of the blue-taped binnacle. Note that you will not remove the binnacle as we have in the picture, but this should give you an idea of the tape coverage. Also tape over the switches. Finally, adjust the steering wheel to its lowest possible position. Tape the top of the steering wheel and then place a towel over the exposed part of the steering column.

4. With everything taped and a cloth on the steering column, you are ready to remove instrument panel. Using a small Torx screwdriver, carefully remove all of the screws in the face of the panel. With the screws removed, grasp the perimeter of the water temp gauge and try to pull it forward. The left side of the cluster needs to come forward first, followed by the speedometer which comes out last (because it needs to move slightly right to left). Be patient, as tugging the cluster forward is often not easy. Just take your time…. scoot the seat forward and make yourself comfortable. It way be necessary to angle the panel slightly upward of downward in order to wiggle it forward. Also, it sometimes helps to press up on the “roof” of the binnacle with your knuckles as you pull the panel forward. Again, work it gently and you’ll get it!
5. As the cluster pulls forward, make sure the harness behind it isn’t hanging you up. Eventually you will be able to pull the cluster toward you and then to lie it facedown on the towel you have on the steering column. See the picture below. Note: In almost all cases you will NOT have enough room to completely remove the cluster from the car as you will not be able to “clear” the connectors at the end of the harness.

6. It is in this position – facedown on the column, that I would recommend that you replace the errant gauge. You will likely need to remove one or more nylon ties. Carefully note the position so you can replace them exactly. (Even though we have done this more than a dozen times, we still take a couple of digital pics – just in case.)
7. With the replacement gauge(s) in place, assembly is simply the reverse of the steps mentioned. The cluster will likely fight you a bit when you are trying to push it back in place. First in is the speedometer (right) side and then work the left side in. You may need to change the angle (up/down) and also press up on the hood of the binnacle. Eventually, you will get it pressed back into place.
8. Re-install the Torx screws and then crawl back under the dash to re-connect the harnesses and press the locator back into its place. Finally, reconnect the battery.
Feel free to PM or email me if you have any questions.


